6. Gradient Ombré Effects
My first gradient nail attempt looked like I’d finger-painted during an earthquake. The colors were muddy, the transition was harsh, and I honestly considered giving up nail art forever.
But ombré nails are so stunning when done right that I couldn’t let it go. After months of practice and way too many YouTube tutorials, I finally cracked the code.
Gradient Techniques That Actually Work
The sponge method is where most beginners start, and honestly, it’s still my go-to for quick gradients. You paint stripes of color on a makeup sponge and dab it onto your nail.
Here’s the trick nobody mentions: dampen your sponge slightly first. Dry sponges absorb too much polish and create patchy, uneven coverage.
Brush blending gives you more control but requires serious patience. I use a flat shader brush and work in tiny circular motions while the polish is still wet.
Airbrush effects using an actual airbrush tool create the smoothest transitions, but let’s be real – most of us don’t have professional equipment lying around.
Color Theory That Makes Sense
Harmonious color transitions follow the color wheel, but I learned this through trial and error rather than art class. Colors next to each other on the wheel blend beautifully.
Warm to cool transitions can look muddy if you’re not careful. I stick with either all warm tones (reds, oranges, yellows) or all cool tones (blues, purples, greens).
Analogous color schemes are foolproof for beginners. Think blue to purple to pink – they’re neighbors on the color wheel so they play nice together.
Monochromatic gradients using different shades of the same color are surprisingly sophisticated. Light pink to deep rose? Absolutely gorgeous.
2025’s Hottest Gradient Combinations
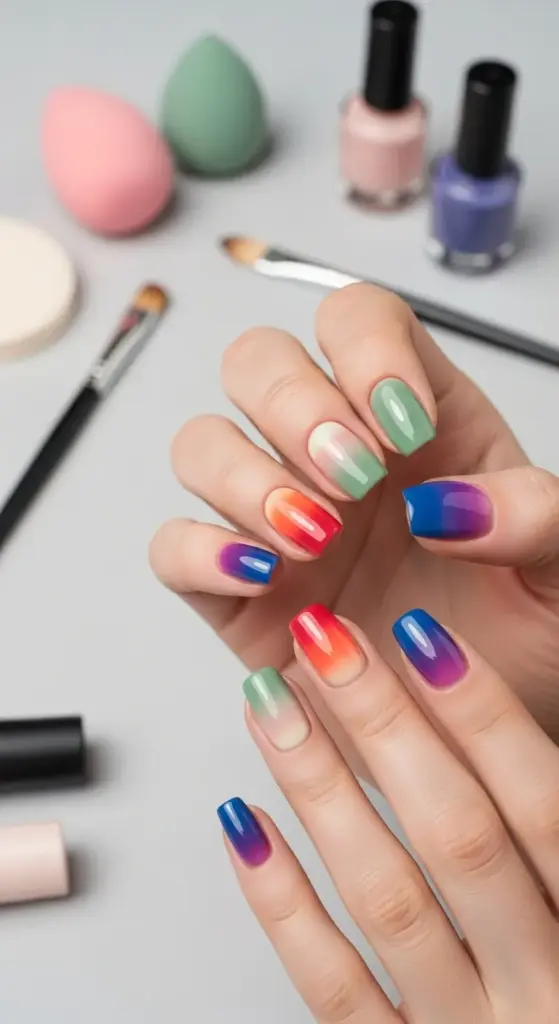
Sunset ombré nails are everywhere right now – coral to orange to deep red creates this dreamy, Instagram-worthy effect.
Sage green to cream gives off major cottagecore vibes that I’m totally here for. It’s earthy but still polished enough for professional settings.
Purple to blue gradients remind me of twilight skies. I use lavender, periwinkle, and navy for this ethereal, mystical look.
Neutral ombré from nude to brown is surprisingly versatile. Works with literally any outfit and looks expensive even with drugstore polish.
Essential Tools for Smooth Application
Makeup sponges are non-negotiable, but not all sponges are created equal. I use beauty blenders cut into small pieces – they have the perfect density.
Nail tape for clean edges changed my gradient game completely. I tape off the skin around my nails before starting the sponging process.
Flat shader brushes in multiple sizes let you blend different areas with precision. I have three different widths that I use depending on the nail size.
Acetone and cleanup brushes are essential for fixing mistakes. I keep a small angled brush dipped in acetone nearby for quick edge cleanup.
Products That Make the Magic Happen
Gel polish works better for gradients than regular polish because it stays workable longer. I have more time to blend before it starts setting.
Base coat quality matters more than I initially thought. Sticky base coats help the gradient layers adhere properly and prevent chipping.
Color-changing polishes can create automatic gradient effects as your nails warm up. It’s like having a mood ring on every finger!
Mixing medium lets you create custom gradient shades. I mix my own transition colors instead of buying every possible shade.
Troubleshooting My Biggest Fails
Muddy colors happen when you blend too aggressively. Light dabbing motions work better than heavy pressure – learned this after ruining countless manicures.
Harsh lines between colors usually mean your polish dried too fast. Work in small sections and keep a damp sponge nearby for touch-ups.
Patchy coverage drove me crazy until I realized I wasn’t using enough polish on my sponge. Don’t be stingy with the product.
Bleeding onto skin is inevitable with sponge application. That’s why liquid latex or peel-off base coat around your nails is a lifesaver.
Advanced Techniques for Show-Stopping Results
Vertical gradients from cuticle to tip create this elongating effect that makes fingers look more elegant.
Horizontal gradients across all five nails tell a complete color story. I love doing sunset themes this way.
Reverse gradients where you start dark at the cuticle and fade to light at the tips create unexpected visual interest.
Glitter gradient overlays add sparkle without overwhelming the base colors. Apply your gradient first, then add glitter concentration at one end.
Ready to discover the trend that’s bringing back the classics with a modern twist? Hit “next” to learn about micro French manicures – the subtle update that’s making traditional French tips look totally outdated!


GIPHY App Key not set. Please check settings