4. 3D Textured Nail Art
I’ll be honest – my first 3D nail art attempt looked like I’d glued random craft supplies to my nails. Which, let’s face it, wasn’t far from the truth.
But once I figured out the proper techniques, these textured nail designs became my absolute favorite way to make a statement. There’s something so satisfying about running your fingers over those raised elements!
The 3D Elements That Actually Stay Put
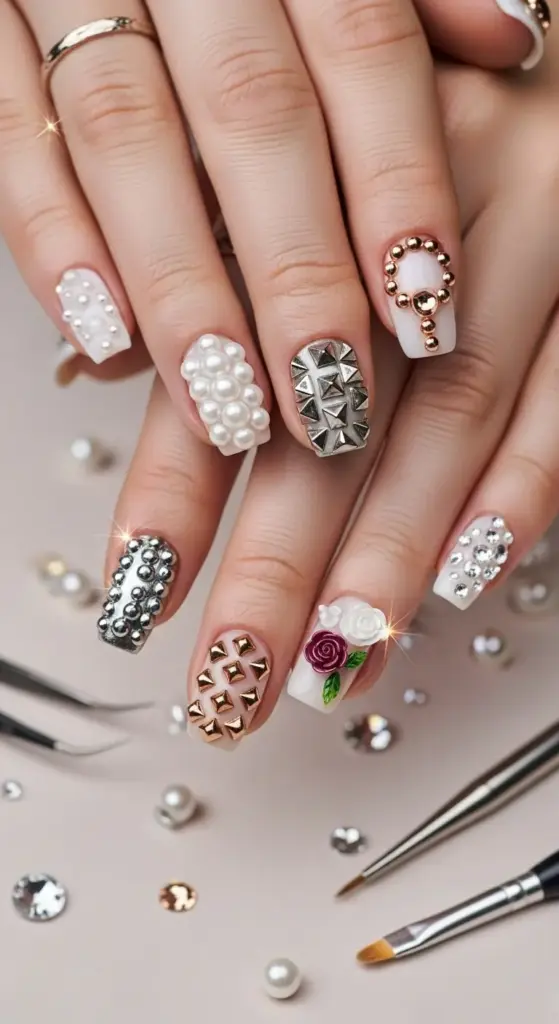
Nail pearls were my gateway drug into the 3D world. They’re forgiving, elegant, and if one falls off, it’s not the end of the world.
Rhinestones are trickier than they look. I learned that Swarovski crystals aren’t just about the brand name – they actually have better faceting that catches light more dramatically than cheap alternatives.
Metal studs give off this edgy vibe that I absolutely love. Square studs, round studs, pyramid studs – I’ve tried them all and honestly gotten a little obsessed.
Sculptural nail designs using acrylic gel are where things get really interesting. You can literally build tiny works of art on your fingertips.
Application Methods That Won’t Fall Apart
Here’s what nobody tells you about 3D nail application: the base has to be slightly tacky for elements to stick properly. I used to cure everything completely and wondered why my pearls kept popping off.
Nail glue isn’t always the answer. For lighter elements like pearls, I use a tiny drop of clear gel polish and cure it with the element in place.
Press down firmly for at least 10 seconds. I know it seems obvious, but I used to just place things and hope for the best. Spoiler: hope isn’t a strategy.
Tweezers are essential for precise placement. I tried using my fingers for months like some kind of caveman before investing in proper nail art tweezers.
Trending Patterns That Look Expensive
Floral 3D nail sculptures are having such a moment right now. I create tiny roses using acrylic powder and a detail brush – takes practice but the results are stunning.
Geometric textures using studs and pearls create this modern, architectural look. Think clean lines and purposeful placement rather than random chaos.
Mixed media nail art is where I let my creativity run wild. Combining pearls with rhinestones and maybe a tiny charm? Pure magic.
Negative space 3D designs are surprisingly sophisticated. Using the natural nail as part of the design while adding strategic 3D elements creates this perfect balance.
Making Your 3D Art Survive Real Life
The harsh reality? 3D nail durability requires some lifestyle adjustments. I learned to open cans with a bottle opener after losing too many beautiful rhinestones to pop-top sodas.
Sleep on your back for the first night after application. I know it sounds dramatic, but those elements need time to fully set.
Top coat application around 3D elements is an art form. You want to seal the edges without covering the dimensional aspects that make them special.
I always keep a small container of backup elements in my purse. When one pops off (and they will), you can do a quick repair instead of living with a gap.
Budget-Friendly Alternatives That Don’t Look Cheap
Amazon nail art supplies have come such a long way. I get mixed packs of pearls and studs for under $10 that rival salon-quality materials.
Dollar store gems can work if you’re selective. Skip the obviously plastic ones, but some of their glass beads are actually decent quality.
DIY sculptural elements using regular acrylic paint and a toothpick can create amazing textures. I’ve made tiny flowers, dots, and even mini geometric shapes this way.
Press-on 3D elements are perfect for special occasions when you want the look without the commitment. Just remove them when you’re done!
My Biggest 3D Disasters (Learn From My Pain)
Using too much adhesive made my nails look lumpy and unprofessional. Less is definitely more with 3D nail attachment.
I once tried to create an entire garden scene on one nail. It looked ridiculous and caught on everything. Strategic placement is key – not every surface needs decoration.
Ready to discover the trend that’s all about what you don’t put on your nails? Hit “next” to explore negative space manicures – the minimalist approach that’s surprisingly harder to master than it looks!


GIPHY App Key not set. Please check settings