5. Witch Hat Silhouettes: Mystical and Chic
Witch hat nails became my signature Halloween look completely by accident. I was running late for a costume party and needed something quick but still festive – turns out, simple black triangles can look absolutely magical with the right technique!
This design is perfect for anyone who wants Halloween vibes without looking like they raided a costume store. It’s sophisticated enough for work but mystical enough to satisfy your inner witch.
Creating Perfect Black Triangular Shapes
The secret to realistic witch hat silhouettes is understanding that real witch hats aren’t perfectly geometric. They have character, curves, and personality!
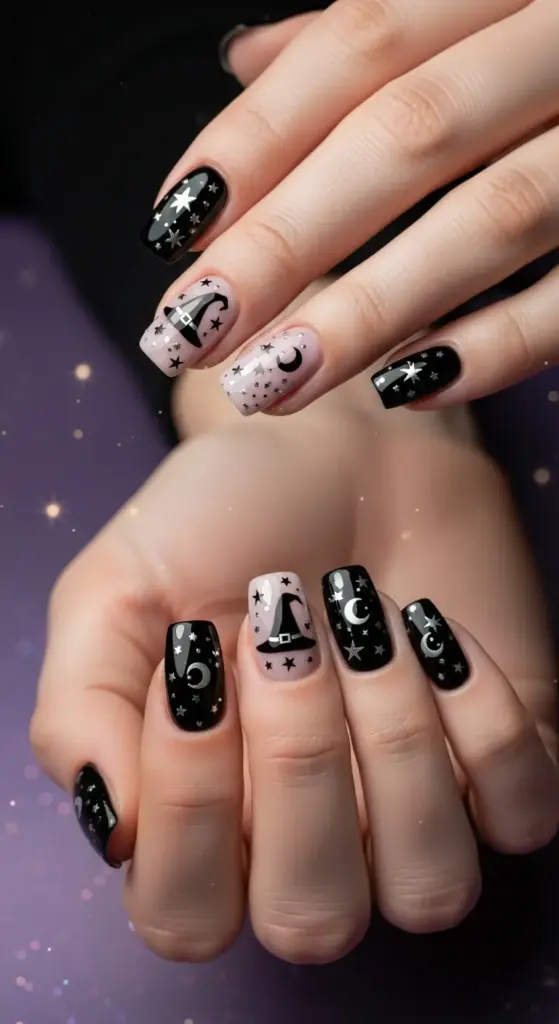
I start with either a nude base or a deep purple – both create stunning contrast with the black hat shapes. Nude gives you that classic, elegant vibe while purple screams mystical witch energy.
For the actual hat shapes, I use a small flat brush loaded with black polish. Start at one corner of your nail and create a triangle, but make the sides slightly curved rather than perfectly straight.
Here’s what I learned after countless wonky hat attempts: witch hat nail art looks best when the hats are positioned at different angles across your nails. Some pointing left, others right, maybe one perfectly centered.
Adding Celestial Moon and Star Accents
Moon and star nail designs are what really elevate this look from simple shapes to magical masterpiece. I use a tiny dotting tool to create small stars scattered around the hat silhouettes.
The key is restraint – I made the mistake early on of adding too many stars and ending up with nails that looked more like a planetarium than a witch’s night sky.
For crescent moons, I use the edge of a small brush to create that perfect curved shape. Sometimes I’ll add just one moon per hand as a focal point, other times I’ll do tiny moons on each nail.
Celestial nail accents work best when they look random and natural. Real night skies aren’t perfectly organized, so neither should your star placement be!
Glitter Gradient Magic
This glitter gradient technique transformed my basic witch hats into something truly enchanting. I discovered it while experimenting with leftover glitter polish from another project.
Start with a fine silver or gold glitter polish and apply it heaviest at the base of your nail, gradually fading it out toward the tip. This creates that magical, starlit sky effect that’s absolutely perfect for the witch theme.
Magical sparkle effects work best when you use a makeup sponge to dab the glitter rather than brushing it on. This gives you more control over the gradient and prevents those harsh glitter lines.
I sometimes add extra glitter just around the witch hat shapes to make them look like they’re glowing with magical energy. It’s subtle but makes such a difference!
Creating Depth with Purple Shades
Using different shades of purple is what takes this design from flat to fabulous. I learned this technique from watching makeup tutorials – the same principles apply to nail art!
I start with a light lavender base, then add deeper purple shadows around the witch hats using a small brush. This creates incredible dimension and makes the hats look like they’re actually sitting on your nails.
Purple gradient nails for this design work best when you blend at least three shades: light, medium, and dark. The light goes at the base, medium in the middle, and dark near the tips.
Sometimes I’ll add just a hint of black to the darkest purple areas to create even more depth. It’s all about building those layers gradually.
Minimalist Halloween Approach
The beauty of subtle Halloween nails is that they work in professional settings where full-on spooky designs might be inappropriate. I’ve worn this look to client meetings without anyone realizing it was Halloween-themed!
Keep your witch hats small and your color palette muted – that’s my golden rule for workplace-appropriate Halloween manicures. Think sophisticated witch rather than cartoon character.
Minimalist nail art for Halloween is all about suggestion rather than obvious imagery. A simple black triangle becomes a witch hat when paired with stars and the right color scheme.
I often do this design with just one accent nail featuring the full witch hat and stars, while the other nails get simple purple gradients or tiny star accents.
Pro Tips for Mystical Success
Witch silhouette nails require steady hands for those clean triangle shapes. I learned to brace my painting hand against a table to minimize shaking – game changer for precision work!
Don’t rush the drying time between layers – I’ve ruined countless mystical masterpieces by being impatient. Each element needs to be completely dry before adding the next.
Use a thin liner brush for the hat brims – that little horizontal line at the base of each triangle makes all the difference in selling the witch hat illusion.
Halloween nail techniques like this one benefit from good lighting. I do all my detailed work under a bright desk lamp to catch any imperfections early.
Color Variations That Actually Work
While black on purple is classic, don’t sleep on black witch hats on nude bases. It’s incredibly chic and works year-round, not just for Halloween.
Silver witch hats on dark blue create this gorgeous night sky effect that’s perfect for anyone who wants something different from the traditional color scheme.
I’ve even tried gold witch hats on deep green – it gives off major forest witch vibes that I’m totally obsessed with.
The whole mystical nail design process takes about 30 minutes if you’re keeping it simple, or up to an hour if you’re going full celestial goddess with all the gradient and glitter work.
Ready to create an entire spooky scene on your fingertips? Click “next” to discover how to paint intricate graveyard scenes that tell a complete Halloween story across your nails – it’s like having tiny horror movie posters at your fingertips!


GIPHY App Key not set. Please check settings