2. Spider Web Nails: Intricate Yet Simple
Okay, I’ll be honest – spider web nails intimidated the heck out of me for years! I kept seeing these gorgeous, intricate designs on Pinterest and thinking there was no way I could pull off something that detailed without going to a nail salon.
Boy, was I wrong. This is probably the most forgiving nail art you’ll ever attempt, and I’m kicking myself for waiting so long to try it.
The Basic White Polish Technique
Here’s the thing about spider web nail art – it’s all about embracing imperfection. Real spider webs aren’t perfectly symmetrical, so neither should yours be!
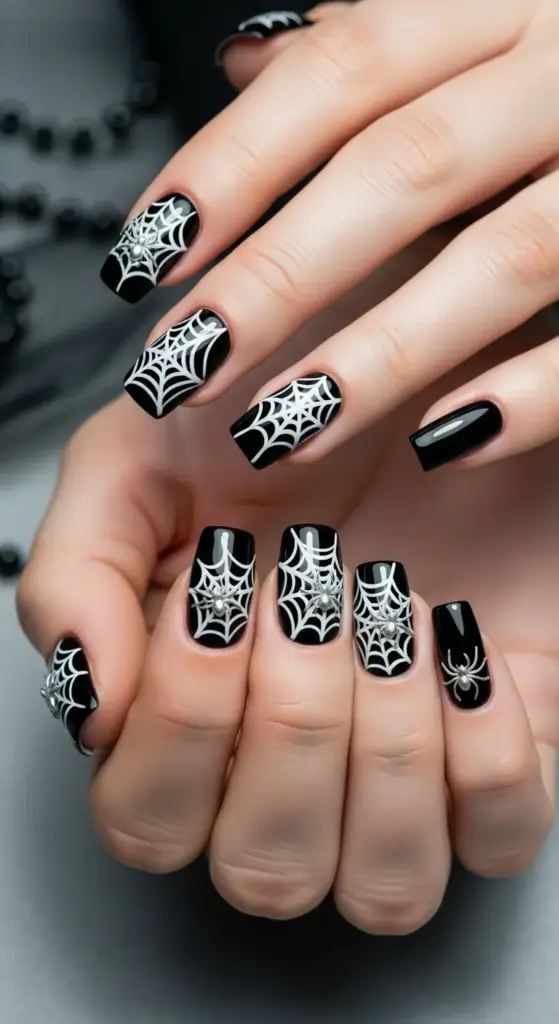
I start with a completely black base coat and let it dry completely. Patience is everything here – trust me, I’ve ruined countless webs by rushing this step.
For the actual web, I use plain white polish with a thin nail art brush. You don’t need anything fancy – I’ve been using the same $2 brush from the drugstore for three years now.
Creating Those Perfect Web Patterns
The secret to realistic web patterns is starting from one corner and working your way across. I usually pick the upper left corner of my nail as my anchor point.
Draw your first line diagonally across the nail – don’t worry if it’s not perfectly straight! Then add a second line that intersects it, creating that classic web foundation.
Here’s where most people mess up: they try to make the connecting lines too perfect. Real spider webs have irregular spacing, so vary the distance between your horizontal connecting lines.
I learned this trick from watching actual spiders in my garden – the outer sections of their webs are always more spaced out than the center. Copy nature, and your Halloween nail designs will look incredibly authentic.
Adding Those Eye-Catching Accents
Once your web is completely dry, it’s time for the fun part – spider nail decorations! I keep a stash of tiny plastic spiders specifically for this purpose.
The key is placement. Don’t just plop that spider in the center – real spiders hang out in corners or along the edges of their webs. Position yours accordingly for maximum realism.
Rhinestone accents can work too, but use them sparingly. I like to add just one or two tiny clear stones to mimic dewdrops caught in the web – it’s subtle but adds such a nice touch.
Color Variations That Actually Work
While classic white on black is stunning, don’t sleep on silver web designs! I use a metallic silver polish that catches light beautifully under party lighting.
Glow-in-the-dark polish is absolutely game-changing for Halloween parties. I discovered this by accident when I grabbed the wrong bottle, and now it’s my go-to for evening events.
Purple webs on black look incredibly gothic and sophisticated. Navy blue webs on dark gray give off major witchy vibes that I’m totally here for.
Fixing Common Web Mistakes
Let me save you some frustration by sharing my biggest spider web fails. First mistake: making the lines too thick. Thin, delicate lines look way more realistic than chunky ones.
Don’t panic if your web looks wonky – I’ve salvaged countless “disasters” by simply adding more intersecting lines. Sometimes the messiest webs end up looking the most authentic.
If your polish bleeds or smudges, let it dry completely then use a tiny brush dipped in nail polish remover to clean up the edges. This technique has saved me so many times!
The biggest game-changer? Practice on a piece of paper first. I spent one evening just drawing web patterns with a regular pen, and it made such a difference in my nail technique.
Pro Tips From My Trial and Error
Work on one nail at a time and let each completely dry before moving to the next. I know it’s tempting to assembly-line this process, but smudged spider webs are not cute.
Keep your brush strokes confident and quick. Hesitant, shaky lines look amateur – even if you mess up, a confident mistake looks better than a perfect but shaky line.
The whole design takes about 20 minutes per hand if you’re taking your time. Rush it, and you’ll end up redoing everything – learned that lesson multiple times during late-night Halloween prep sessions!
Ready to add some elegance to your spooky manicure? Hit that “next” button to learn how to create ghostly French tips that are sophisticated enough for the office but spooky enough for Halloween – it’s the perfect balance between professional and playful!


GIPHY App Key not set. Please check settings