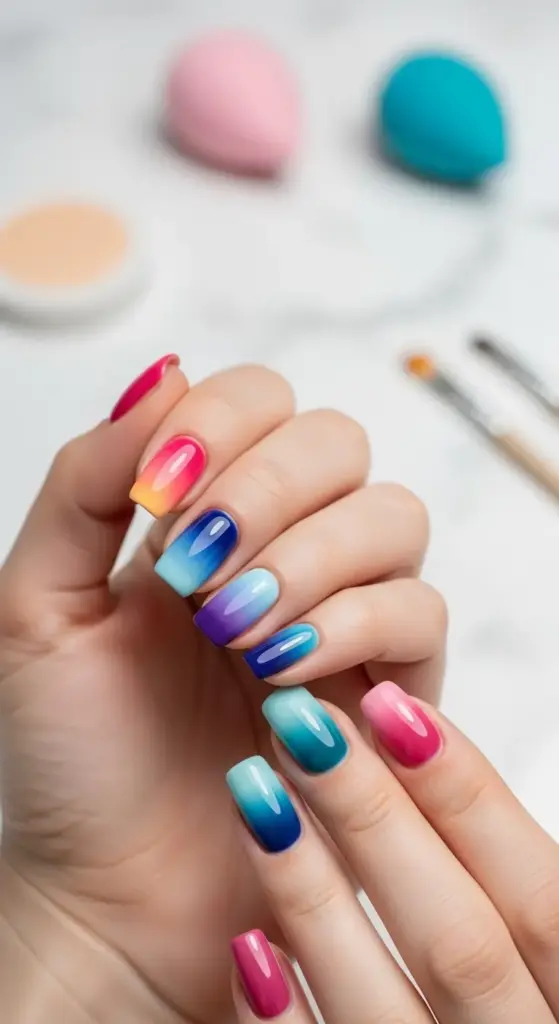
4. Subtle Gradient Glam
Gradient nails used to intimidate me so much that I avoided them for years. Then I realized I was overthinking the whole process and making it way more complicated than it needed to be.
My first ombre attempt looked like I’d dipped my nails in muddy water. Definitely not the dreamy sunset effect I was going for, but it taught me everything about color blending.
Ombre Techniques Specifically for Short Nails
Here’s what nobody tells you about short nail gradients – the technique is completely different from long nail methods. You’re working with limited real estate.
Vertical gradients work better on short nails than horizontal ones. The color transition from cuticle to tip creates the illusion of length.
I’ve found that three-color gradients maximum look best on short nails. Any more colors and it starts looking muddy instead of smooth.
Start with your lightest shade as the base color. This creates the foundation for a seamless blend that doesn’t look patchy.
Color Combinations That Create Stunning Gradients
After trying every color combination imaginable, I’ve discovered which gradient color schemes actually work on short nails.
Monochromatic gradients using different shades of the same color are foolproof. Pink to deep rose, or light blue to navy – always gorgeous.
Sunset gradients with coral, orange, and pink create this dreamy effect that photographs beautifully. Perfect for summer vibes.
Cool-toned gradients using purples, blues, and teals look incredibly sophisticated. The color flow is naturally pleasing to the eye.
Sponge Application Methods for Smooth Transitions
The makeup sponge technique changed my entire gradient game. But not all sponges are created equal – I learned this the hard way.
Use a dense makeup sponge, not those fluffy beauty blenders. The tight texture creates smoother color transitions without streaking.
Dampen the sponge slightly before applying polish. Completely dry sponges absorb too much product and create patchy coverage.
Paint your colors directly onto the sponge in the order you want them on your nail. Blend them slightly on the sponge first.
The Dabbing Technique That Actually Works
Here’s my secret for smooth gradient application: don’t drag the sponge across your nail. Dab it straight down repeatedly.
Light pressure is key – pressing too hard creates harsh lines instead of smooth transitions. Let the sponge do the work.
Work quickly because polish starts setting fast on sponges. I usually do one nail at a time for the best results.
Multiple thin layers create better gradients than trying to get perfect coverage in one application. Build up the intensity gradually.
Adding Glitter Accents to Gradient Designs
Glitter gradient overlays take your ombre to the next level. I was scared to try this combo at first, thinking it would look too busy.
Fine glitter works better than chunky pieces on gradient nails. The sparkle enhances the color transition instead of competing with it.
Apply glitter while the gradient is still slightly tacky for better adhesion. Waiting too long makes the glitter sit on top instead of blending.
Concentrated glitter at the tips creates this gorgeous fade effect that makes your nails look professionally done.
Troubleshooting Common Gradient Mistakes
Let me save you from the gradient disasters I’ve experienced. These mistakes are so common but totally fixable once you know what to look for.
Muddy colors happen when you blend complementary colors that create brown when mixed. Stick to colors in the same family.
Harsh lines instead of smooth transitions usually mean your sponge was too dry or you pressed too hard during application.
Patchy coverage is often from using the wrong type of sponge or not building up thin layers properly.
The Cleanup Process That Makes It Look Professional
Gradient cleanup is crucial because this technique gets messy. I always use liquid latex or tape around my nails now.
Small cleanup brush dipped in acetone works perfectly for removing excess polish from skin. Work carefully around the cuticle area.
Clean up while the polish is still wet when possible. Dried gradient polish is much harder to remove cleanly.
My Favorite Gradient Formulas
Gel polish gradients last longer and blend more smoothly than regular polish. The extended working time makes blending easier.
Sheer polishes create the most natural-looking gradients. You can build up opacity gradually for perfect color transitions.
Cream formulas blend better than shimmer polishes for base gradients. Save the shimmer for accent layers on top.
Advanced Gradient Techniques
Double gradients using different color families on each half of the nail create this amazing rainbow effect. Takes practice but looks incredible.
Reverse gradients starting dark at the cuticle and going light at the tip make nails appear longer. Perfect optical illusion for short nails.
Textured gradients combining matte and glossy finishes add dimension that regular gradients can’t achieve.
Ready to learn how delicate floral designs can transform your short nails into tiny works of art? The next section reveals the dotting tool techniques that’ll have everyone asking about your adorable flower nail art!

GIPHY App Key not set. Please check settings