7. The “Hidden Glitter Sandwich” Method
I stumbled onto this technique completely by accident when I spilled ultra-fine glitter into my wet red polish. Instead of starting over, I decided to see what would happen if I applied another coat on top.
The result was absolutely magical – my nails looked like they had this inner glow that I couldn’t quite explain. It wasn’t obviously glittery, but there was definitely something special happening under those lights.
The Layering Technique That Changes Everything
The “sandwich” method is all about trapping glitter between layers of red polish. Most people think you just mix glitter into polish – that creates a completely different effect.
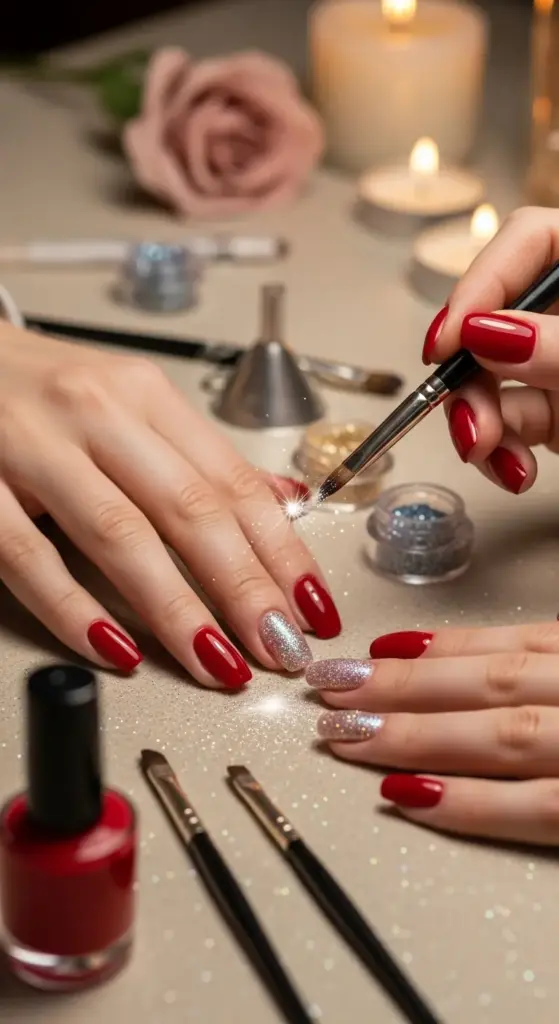
First layer: your red base color at full opacity. Second layer: ultra-fine glitter applied strategically. Third layer: another coat of the same red to “sandwich” the sparkle inside.
The magic happens in that middle layer – the glitter catches light from within the polish rather than sitting on top where it looks obvious and craft-store cheap.
Glitter Types That Create Professional Results
Ultra-fine cosmetic glitter is your best friend here. We’re talking about particles so small they’re almost like shimmer powder – around 0.004 inches in diameter.
Holographic micro-glitter creates the most expensive-looking effect. It shifts colors subtly as you move your hands, adding depth without screaming “I have glitter nails!”
Avoid chunky craft glitter at all costs – it looks amateur and creates texture bumps that ruin the smooth, professional finish you’re going for.
My Step-by-Step Application Process
Start with your red base coat applied normally – two thin coats for full opacity. Let this dry until it’s about 80% set but still slightly tacky.
Dust the glitter over the tacky surface using a fluffy makeup brush. Don’t dump it on – we want just enough sparkle to catch light subtly.
Work quickly – you have maybe 90 seconds before the base gets too dry for the glitter to adhere properly.
Application Timing for Perfect Adhesion
Timing is absolutely critical with this technique. Too early and the glitter sinks completely into the polish and disappears. Too late and it sits on top looking obvious.
The polish should feel slightly sticky when you touch it lightly with your finger. That’s your perfect application window – usually about 3-4 minutes after application.
Temperature affects timing dramatically. On hot days, work faster. Cold days give you a bit more time to get the glitter placement perfect.
Creating That Luxury Look Without Obvious Sparkle
The secret is restraint. Less glitter creates a more expensive look than more glitter – this isn’t a disco ball situation.
Strategic placement matters too. I focus glitter on the center third of each nail where it catches the most light but doesn’t look overdone.
The final red coat is crucial – it needs to be thin enough to let the glitter show through but opaque enough to create that “inner glow” effect.
Celebrity Manicurists’ Favorite Combinations
Jennifer Lopez’s nail artist uses champagne micro-glitter under deep red polish. It creates this gorgeous warm undertone that photographs beautifully under camera lights.
Blake Lively’s manicurist swears by rose gold holographic glitter under classic red shades. The combination is feminine and sophisticated without being too flashy.
Zendaya’s nail team frequently uses silver micro-glitter under bright reds for red carpet events. It adds just enough sparkle to catch camera flashes without looking overdone.
Professional Application Secrets
Brush selection makes a huge difference. I use a dense, flat makeup brush to apply glitter evenly without creating streaks or bald spots.
Tap off excess glitter before applying – you want just enough on the brush to create subtle sparkle, not a glitter explosion.
Work in sections if you have longer nails. The glitter needs to be applied while the base is at the perfect tackiness level.
Glitter Combinations That Actually Work
Gold micro-glitter under burgundy or wine reds creates this incredible depth that looks like expensive jewelry. It’s my go-to for evening events.
Silver holographic glitter works amazingly under true reds and blue-based reds. The cool undertones complement each other perfectly.
Copper micro-glitter under orange-reds or coral shades creates this gorgeous warm glow that’s perfect for fall and winter seasons.
Avoiding the Craft Store Look
Size matters – anything larger than ultra-fine will look obviously glittery rather than subtly luminous. Stick to cosmetic-grade micro-glitter only.
Color coordination is key – the glitter should complement your red shade, not compete with it. When in doubt, go with silver or gold.
Application density should be light and even. Patchy glitter application screams amateur, while even, subtle coverage looks professional.
Tools for Perfect Results
High-quality makeup brushes are worth the investment. I use synthetic bristle brushes that don’t absorb product and create even application.
A small funnel helps control glitter application and prevents waste. I made one from rolled paper – it works perfectly for precise placement.
Good lighting is essential while working. You need to see exactly how much glitter you’re applying to avoid overdoing it.
Maintenance and Longevity Tips
Top coat application requires extra care with glitter sandwich nails. Use thin, even coats to avoid disturbing the glitter layer underneath.
Reapply top coat every 4-5 days to maintain that glossy, professional finish. The glitter can make the surface slightly textured over time.
Gentle removal is important – the glitter can make polish removal take longer, so be patient and use plenty of acetone.
Common Mistakes That Ruin the Effect
Too much glitter is the most common error. Remember, we’re going for subtle inner glow, not obvious sparkle.
Applying glitter to completely dry polish results in poor adhesion and glitter that flakes off within hours.
Skipping the final red coat leaves the glitter too obvious and ruins that expensive “inner light” effect we’re trying to achieve.
Professional Finishing Touches
Edge sealing with top coat prevents glitter from catching on clothing or hair. Pay special attention to the nail tips.
Cuticle cleanup is crucial – any glitter on the skin looks messy and unprofessional. Use a small brush with acetone for precise cleanup.
Final inspection under different lighting conditions ensures your glitter sandwich looks perfect in all situations – natural light, indoor lighting, and camera flash.
Conclusion
There you have it – seven closely guarded secrets that celebrity manicurists have been using to create those jaw-dropping red manicures you’ve been admiring on Instagram and red carpets! These aren’t just techniques; they’re artistic methods that transform ordinary red polish into extraordinary nail art.
The beauty of these insider secrets? You don’t need a Hollywood budget to achieve them. With the right knowledge and a little practice, you can recreate these stunning looks at home and finally get those “Where did you get your nails done?” compliments you’ve been craving.
Ready to elevate your red nail game? Pick one technique that speaks to you and give it a try this weekend. Trust me, once you master even one of these celebrity secrets, you’ll never look at regular red polish the same way again. Your nails will thank you, and so will your confidence!

GIPHY App Key not set. Please check settings