6. The “Ombré to Clear” Fade Technique
This technique literally took me three months to master. I’m not even exaggerating – my first attempts looked like someone had accidentally smudged red polish halfway down my nails.
But once I figured out the secret to seamless color transitions, this became my absolute favorite way to wear red polish. It’s sophisticated, modern, and makes people think you spent serious money at a high-end salon.
Advanced Brush Work for Perfect Transitions
The biggest game-changer was realizing I needed three different brushes for this technique. Most people try to do everything with the polish brush – that’s why it looks amateur.
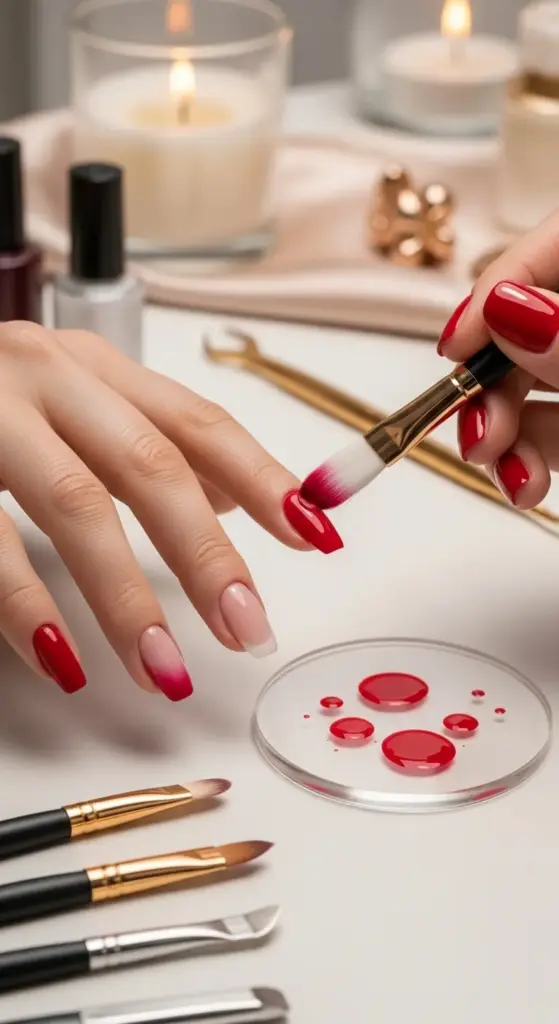
Flat shader brush for the initial color placement, fluffy blending brush for the transition zone, and clean detail brush for final smoothing. This brush trio changed everything for my ombré game.
The key is working in overlapping sections rather than trying to create one perfect gradient. I learned this from watching a professional nail artist’s technique frame by frame on YouTube.
Color Placement Strategies for Different Nail Shapes
Oval nails look stunning with the fade starting about 60% down from the cuticle. This creates an elegant, elongated effect that’s super flattering.
Square nails need the color placement closer to 70% down – any higher and it looks unbalanced. Almond-shaped nails can handle the most dramatic fades, starting as low as 50%.
Short nails are tricky but totally doable. Keep the colored area to about 40% of the nail length – any more and you lose that ethereal fade effect.
My Step-by-Step Blending Process
Start with your red polish at full opacity near the cuticle area. Apply it thick enough to be completely opaque but not so thick that it takes forever to dry.
While it’s still wet, use your clean blending brush to gently pull the color downward. The key word here is “gently” – aggressive brushing creates streaks.
Work in tiny circular motions as you move toward the clear area. This creates that seamless transition that looks professionally airbrushed.
Professional Blending Tools That Actually Work
Synthetic brushes work way better than natural bristles for this technique. Natural brushes absorb too much polish and create uneven blending.
I swear by makeup blending brushes – specifically the fluffy eyeshadow brushes from drugstore brands. They’re perfect for nail ombré and cost about $3 each.
Clean brushes are absolutely crucial. I keep three clean brushes ready for each manicure – one gets dirty fast, and you need backups for smooth blending.
Why This Creates an Expensive Custom Look
The ombré fade technique mimics expensive airbrush work that costs $80+ in high-end salons. When done correctly, it’s impossible to tell it wasn’t professionally applied.
The seamless transition creates this optical illusion that your nails are naturally tinted rather than painted. It looks effortless and sophisticated – exactly what expensive manicures aim for.
Color theory plays a huge role here. The gradual fade tricks the eye into seeing depth and dimension that flat color simply can’t achieve.
Advanced Blending Secrets
Temperature matters more than most people realize. Slightly warm polish blends easier than cold polish straight from the bottle.
I keep my red polish in warm water for about 5 minutes before starting. Not hot water – that creates bubbles – just comfortably warm.
Humidity affects drying time dramatically. On humid days, I use a nail dehydrator before starting to prevent the polish from staying tacky too long.
Color Placement for Maximum Impact
Deep reds look incredible with the fade starting high on the nail – about 70% up from the tip. This creates drama while maintaining elegance.
Bright reds work better with lower placement – around 50-60% up. Too high and the color becomes overwhelming rather than sophisticated.
Berry reds are perfect for subtle fades that start very high – even 80% up from the tip. The darker tone allows for more dramatic placement.
Maintenance Tips for Extended Wear
Top coat application is critical for longevity. I use two thin coats rather than one thick coat – it prevents the ombré from looking muddy.
Reapply top coat every 3-4 days to maintain that glossy, professional finish. The fade technique shows wear more obviously than solid color.
Cuticle oil placement matters with ombré nails. Keep it away from the colored area – it can cause the fade to shift and look uneven.
Common Blending Mistakes to Avoid
Working too slowly is probably the biggest error. You have about 60 seconds to create your blend before the polish starts setting up.
Over-blending creates a muddy, streaky look instead of a smooth transition. Less is more – a few gentle strokes are better than aggressive brushing.
Inconsistent pressure while blending creates uneven fades. Practice maintaining the same light touch throughout the entire transition zone.
Professional Finishing Techniques
Edge cleanup is crucial for a polished look. Use a small angled brush with acetone to perfect the fade line and remove any mistakes.
Seal the tips with extra top coat – the clear area is more prone to chipping since there’s less polish protection.
Final smoothing with a clean brush after everything’s dry eliminates any texture differences between the colored and clear areas.
Tools That Make All the Difference
Quality brushes are worth the investment. I use Kolinsky sable brushes for the finest detail work – they hold their shape and create flawless blends.
A good palette for mixing colors is essential. I use a glass tile from the hardware store – it’s smooth, easy to clean, and costs under $2.
Brush cleaner specifically for nail art brushes extends their life dramatically. Regular acetone is too harsh and ruins the bristles quickly.
Ready for the final secret that will completely transform your red nail game? Hit next to discover the “Hidden Glitter Sandwich” Method – the subtle sparkle technique that makes your red polish look like it contains actual crushed diamonds and costs practically nothing to achieve!

GIPHY App Key not set. Please check settings