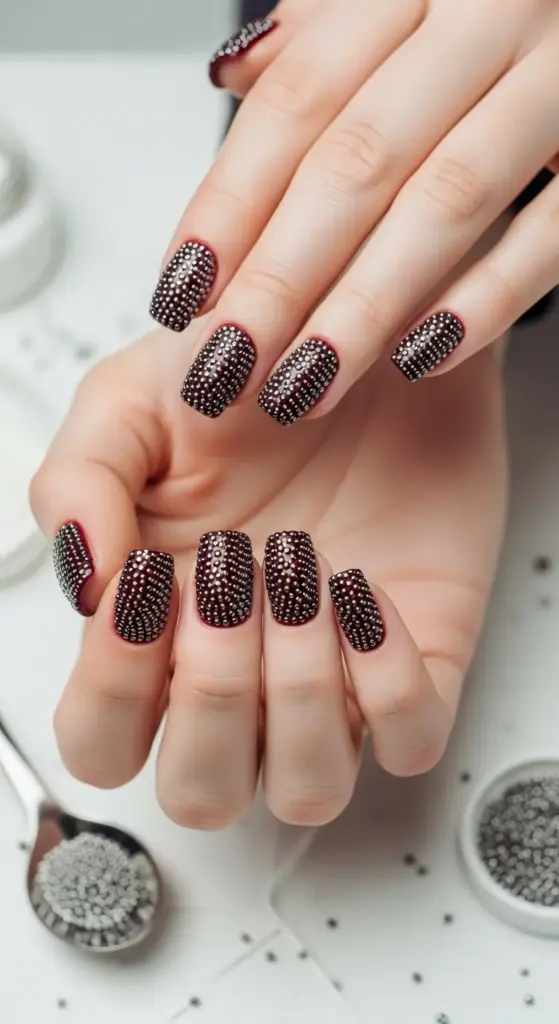
5. Textured Dark Red with Caviar Beads
Let me just say, caviar bead nails looked so easy in those satisfying TikTok videos. Reality check – my first attempt looked like I’d dunked my nails in fish eggs and called it a day!
The beads were clumpy in some spots, completely missing in others, and half of them fell off before I even left the house. I was so frustrated I almost gave up on textured nails entirely.
Getting Even Coverage Without Bald Spots
The secret is in the base polish application – it needs to be wet but not dripping. I apply my dark red polish and immediately sprinkle the caviar beads while it’s still tacky.
Don’t dump the beads on like I did the first time! Use a small spoon to gently cascade them over your nail, letting gravity do the work. This prevents those awful clumpy areas.
Work one nail at a time – seriously, don’t try to be efficient here. By the time you finish the fifth nail, the first one’s too dry for proper bead adhesion.
I use a soft brush to gently press the beads into the polish after application. This ensures they’re embedded properly and won’t fall off at the first bump.
Dark Red Shades That Make Caviar Beads Shine
Essie Bordeaux is my go-to base because it’s got enough depth to make the beads pop without being so dark they disappear. The slight purple undertones are gorgeous with silver caviar beads.
OPI Big Apple Red works beautifully with gold caviar beads – the contrast is stunning and very luxe-looking. Plus it stays wet long enough for proper bead application.
Sally Hansen Red Carpet is perfect for black caviar beads. The formula stays workable for about 45 seconds, which gives you enough time to get even coverage without rushing.
For a more subtle look, I love Zoya Rekha – it’s this deep wine color that makes caviar beads look like tiny pearls embedded in the polish.
Sealing Techniques That Actually Work
Here’s where most tutorials fail you – regular top coat will dissolve caviar beads. I learned this the expensive way when my beautiful textured nails turned into a goopy mess!
Use a gel top coat instead, but apply it super carefully. I use a detail brush to dab the gel around and between the beads, not over them. This seals the edges without flattening the texture.
Two thin coats work better than one thick coat. The first coat seals the beads in place, the second adds durability and shine to the spaces between beads.
Let each coat cure for exactly 60 seconds under LED light. Over-curing makes the gel too hard and can cause the beads to pop off later.
Creative Patterns Using Different Bead Sizes
Gradient bead sizes create this amazing dimensional effect. I use large caviar beads at the cuticle area, medium in the middle, and micro beads at the tips.
Accent nail designs work great with caviar beads. I’ll do four regular burgundy nails and one textured accent nail – it’s eye-catching without being overwhelming.
Half-moon caviar patterns are surprisingly elegant. I mask off the cuticle area with tape, apply beads to just that section, then remove the tape for a clean line.
My favorite trick? Ombré caviar coverage – dense beads at the tips fading to sparse coverage toward the cuticles. It creates movement and looks incredibly sophisticated.
Safe Removal Without Nail Damage
Never try to pick off caviar beads – I damaged my nail surface doing this and it took weeks to recover. The beads are harder than your nails and will win that battle!
Soak cotton pads in acetone and place them on each nail, then wrap with foil. Let them sit for 10-15 minutes – the acetone will dissolve the polish and the beads will come off easily.
Gentle pushing with a cuticle stick helps remove stubborn beads after soaking. Don’t scrape or dig – just gentle nudging motions.
Follow up with cuticle oil and hand cream because acetone is harsh. I always do a strengthening treatment after removing textured nails.
Pro Tips That Save Time and Frustration
Buy quality caviar beads – the cheap ones from Amazon are often different sizes even within the same container. Consistent bead size makes all the difference in the final look.
Work over a towel to catch falling beads. You can actually reuse them if they’re clean, which saves money since good caviar beads aren’t cheap.
Room temperature matters – if your hands are too warm, the polish dries too fast. If they’re too cold, the polish stays wet too long and beads slide around.
Ready for something completely different? Click “next” to learn the stunning dark red marble effect with white and gold veining – I’ll share the water marbling hack that creates the most realistic stone patterns you’ve ever seen!


GIPHY App Key not set. Please check settings