2. Dark Red Ombré with Black Tips
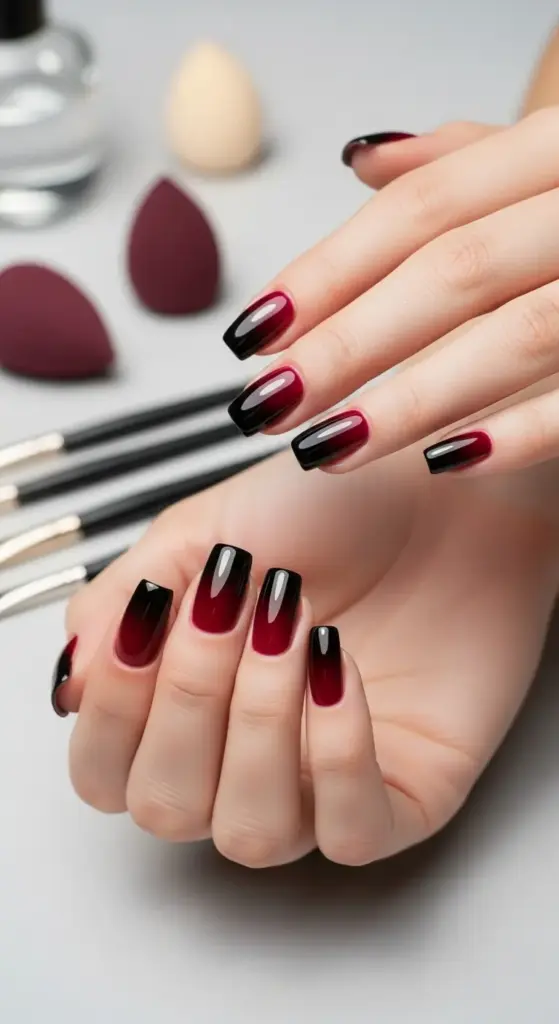
I’ll be honest – my first attempt at dark red ombré nails looked like I’d dipped my fingers in mud. The transition was so harsh it looked like two completely different manicures on one hand!
It took me about fifteen tries to figure out that ombré isn’t just about blending colors. It’s about understanding how pigments interact and having the right tools for the job.
The Step-by-Step Gradient Technique That Actually Works
Start with your base coat and let it cure completely. Then apply one thin coat of your dark red polish to the entire nail – this creates the foundation for blending.
Here’s where most people go wrong – they try to blend wet polish with wet polish. Instead, apply your black polish only to the tip area while the red is still slightly tacky.
Use a makeup sponge (not a nail sponge!) to dab and blend where the colors meet. I use those little triangular beauty blenders cut in half – they give you way more control than those chunky nail sponges.
The magic happens in the dabbing motion. Don’t drag or swipe – just gentle up-and-down presses until you see that gorgeous gradient forming.
Essential Tools That Make All the Difference
After wasting money on cheap brushes, I invested in proper tools. You need a flat shader brush (size 6 works perfectly), latex-free makeup sponges, and acetone for cleanup.
Don’t skip the cleanup brush – I use a small angled brush dipped in acetone to clean up the cuticle area. Your ombré might be perfect, but messy cuticles will ruin the whole look.
Cuticle tape is a game-changer too. I place it around my nail before starting the ombré process, then peel it off for crisp, clean edges.
Getting the Color Ratios Right
This is where I messed up for months! The perfect burgundy to black ombré needs a 70-30 ratio in the transition zone. Too much black and it looks harsh, too little and there’s no drama.
I mix a tiny drop of black into my wine-colored polish to create that perfect middle tone. This intermediate shade is crucial – it’s what makes the gradient look seamless instead of like two separate colors.
For crimson ombré nails, I actually use three colors: the base crimson, a deep burgundy middle tone, and pure black at the tips. The extra step makes all the difference.
Fixing Common Ombré Disasters
When your gradient looks muddy (been there!), don’t panic. Let it dry completely, then use a small detail brush with your base red color to rebuild the transition area.
Patchy blending happens when your sponge is too wet. I learned to squeeze out excess polish from the sponge before dabbing – it should be damp, not soaking.
If the black overwhelms the red, use a clean sponge with just red polish to push back the dark color. You can actually “erase” mistakes this way if you work quickly.
Stunning Variations That’ll Make You Stand Out
Deep burgundy with charcoal tips is my go-to for professional settings. It’s dramatic but not too bold for conservative workplaces.
Wine red fading to deep plum creates this gorgeous vampy look that’s perfect for fall. I add a tiny bit of purple to the black to achieve that plum tone.
My personal favorite? Crimson red ombré with just a hint of brown mixed into the black tips. It creates this rich, chocolate-cherry effect that looks expensive and sophisticated.
Want to take your nail game even further? Hit “next” to discover how glossy dark red with negative space geometric patterns can create mind-blowing optical illusions on your nails – the technique I’m about to share uses everyday household items!


GIPHY App Key not set. Please check settings