7. Waterproof Nail Stickers and Decals
I used to be such a nail art snob. Like, if it didn’t take me three hours and involve seventeen different brushes, it wasn’t “real” nail art.
Then I discovered waterproof nail stickers the night before a last-minute weekend trip to Key West. I had exactly zero time for elaborate nail art but desperately wanted something cute for all those beach photos.
Best. Decision. Ever.
Those stickers lasted through snorkeling, beach volleyball, and way too many piña coladas. Meanwhile, my friend who spent hours on hand-painted designs was doing touch-ups by day two.
Selecting Quality That Actually Lasts
Here’s the harsh truth about nail decals: most of them are garbage that’ll peel off the second you touch water. I learned this the expensive way after buying cute tropical stickers from three different brands that all failed miserably.
High-quality swim-proof decals have a few telltale signs. They feel thicker and more substantial than cheap ones – not flimsy or papery.
Look for stickers that specifically say “waterproof” or “swim-proof” on the packaging. “Water-resistant” isn’t the same thing and won’t survive actual beach activities.
The adhesive should feel slightly tacky but not overly sticky. If it’s so sticky it’s hard to reposition, it’s probably going to be a nightmare to remove later.
I always test one sticker on my thumb nail first before committing to a full manicure. Better to waste one decal than ruin ten nails.
Application Techniques for Zero Bubbles
The difference between professional-looking nail sticker application and obvious DIY disaster is all in the technique. Bubbles are the enemy here.
Start with completely clean, dry nails. Any oil or moisture will prevent proper adhesion and create those telltale bubble spots.
Room temperature is crucial. If your hands are cold, the stickers won’t conform properly to your nail curve. If they’re too warm, the adhesive gets too sticky and hard to position.
I use tweezers to position the sticker, then smooth it down with a cuticle pusher starting from the center and working outward. This pushes out any air bubbles as you go.
The secret trick? Gentle heat from a hair dryer for 10-15 seconds after application. It helps the sticker conform to your nail shape and creates a stronger bond.
Brand Recommendations That Actually Work
After testing probably twenty different nail decal brands, I’ve found the ones that actually deliver on their waterproof promises.
Dashing Diva makes incredible semi-cured gel strips that last up to two weeks. Their tropical collection is perfect for beach vacations, and they truly are swim-proof.
Color Street nail strips are my go-to for quick application. They’re 100% nail polish in strip form, so they feel more like real polish than stickers.
For beach-themed designs, I love Lily & Fox nail wraps. Their palm tree and ocean wave patterns are gorgeous and surprisingly sophisticated.
Incoco (now part of Color Street) has these amazing holographic and metallic options that photograph beautifully against beach backgrounds.
Avoid the super cheap ones from discount stores – they’re never truly waterproof no matter what the package claims.
Beach Theme Designs That Don’t Look Cheesy
The biggest challenge with beach-themed nail art is avoiding that tacky, tourist-trap look. Not all tropical designs are created equal.
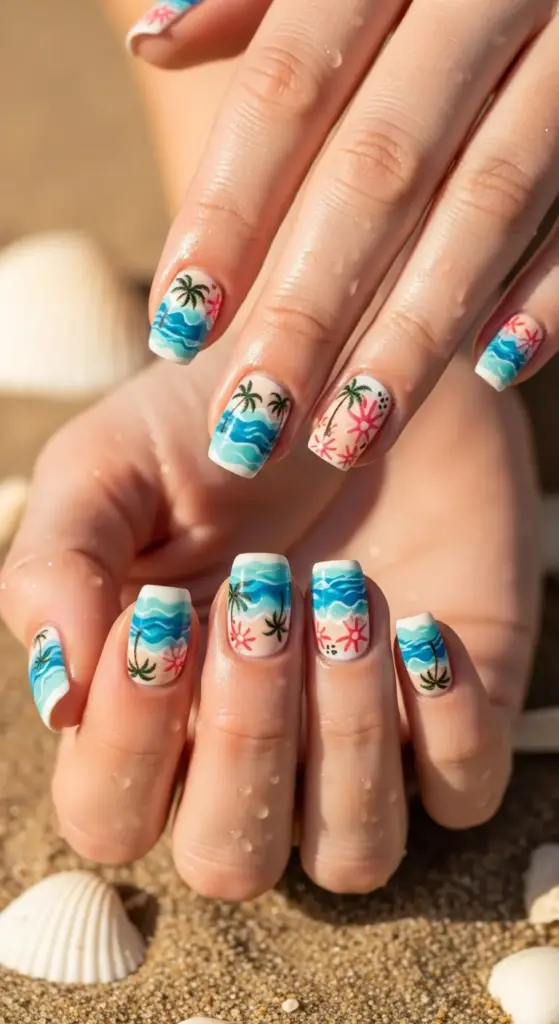
Abstract wave patterns in blues and whites look sophisticated and beachy without screaming “I bought this at a souvenir shop.”
Minimalist palm tree silhouettes are way more elegant than those cartoonish palm tree designs with bright green fronds.
I love ombre sunset effects in sticker form – they give you that gorgeous gradient look without the hassle of blending colors yourself.
Metallic gold accents with subtle beach motifs (like tiny shells or starfish) strike the perfect balance between themed and sophisticated.
Stay away from anything with cartoon characters, overly bright neon colors, or busy patterns that compete with each other.
Layering for Maximum Durability
Here’s where most people mess up their nail sticker manicures: they skip the proper base and top coat layers thinking the stickers are enough on their own.
Always start with a base coat. It protects your natural nails and gives the stickers a smooth surface to adhere to.
Apply your stickers to completely dry base coat, then wait 5-10 minutes before adding topcoat. Rushing this step causes smudging and bubbling.
Two thin topcoat layers work better than one thick one. The first layer seals the edges of the sticker, the second adds that glossy, protective finish.
I use Seche Vite for the final topcoat because it shrinks slightly as it dries, creating a tight seal around the sticker edges.
Quick Touch-Up Strategies
The beauty of waterproof nail decals is how easy they are to maintain and touch up during your vacation.
If a corner starts lifting, don’t panic. Clean the area with rubbing alcohol, press the sticker back down, and seal with a thin layer of topcoat.
For small chips or scratches in the topcoat, a quick swipe of clear polish usually does the trick. You don’t need to redo the entire nail.
I always pack a few extra stickers in the same design for emergency replacements. They take up zero space in your luggage and can save your manicure if disaster strikes.
Cuticle oil is still important even with stickers. Dry, raggedy cuticles make even perfect nail art look sloppy.
Last-Minute Application Hacks
Sometimes you literally have minutes to get your nails vacation-ready. Quick nail sticker application is a lifesaver in these situations.
Skip the base coat if you’re really pressed for time – the stickers will still adhere, just maybe not for as long.
Use a hair dryer on cool setting to speed up drying time between layers. Hot air can cause bubbling, but cool air helps everything set faster.
Pre-cut your stickers before you start applying. Nothing’s more frustrating than trying to trim stickers with wet topcoat on your other nails.
For the absolute fastest application, choose full-coverage nail wraps instead of accent stickers. One piece covers the entire nail, so there’s less positioning and trimming involved.
The Reality Check
Let’s be honest about nail sticker longevity. Even the best waterproof decals won’t last as long as a professional gel manicure, and that’s okay.
I typically get 5-7 days of perfect wear from high-quality stickers, which is perfect for most beach vacations. After that, they start showing wear around the edges.
The trade-off is worth it though – 30 minutes of application time versus 3+ hours for hand-painted nail art, and results that look just as good in photos.
Plus, when they do start wearing off, removal is usually much gentler on your natural nails than gel or acrylics.
Conclusion
There you have it – seven absolutely stunning beach nail ideas that won’t let you down when you need them most! Each of these designs has been tested in real beach conditions, from snorkeling adventures to beach volleyball tournaments. The best part? You don’t need to be a nail artist to pull them off.
Remember, the key to vacation-ready nails isn’t just about looking good – it’s about feeling confident and carefree while you’re making memories. Choose the design that speaks to your style, prep your nails properly, and get ready to receive compliments from strangers on the beach!
Ready to transform your vacation nail game? Pick your favorite design from this list and start practicing before your next getaway. Your future self (and your Instagram followers) will thank you!


GIPHY App Key not set. Please check settings