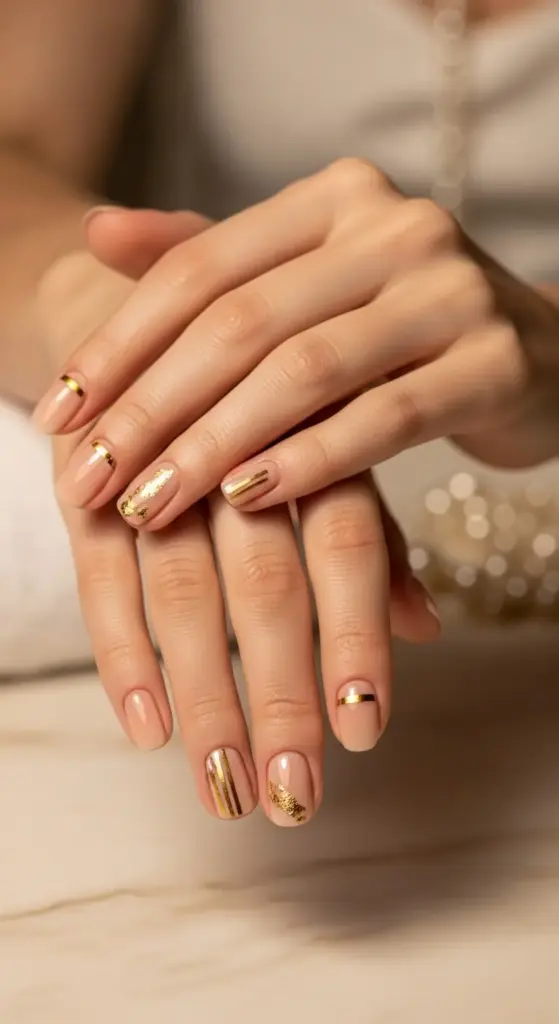
3. Minimalist Nude with Gold Accents
I used to think nude nails were boring. Like, why even bother painting your nails if they’re just going to look like… well, your nails?
Then I discovered the magic of gold accent nails during a girls’ trip to Santorini. My friend Sarah had these gorgeous nude nails with tiny gold foil details that caught the light every time she moved her hands.
I was obsessed. And honestly? A little jealous.
Finding Your Perfect Nude Match
Here’s what nobody tells you about nude nail polish: there’s no such thing as a universal nude shade. What looks amazing on your bestie might make your hands look washed out or weirdly orange.
I learned this the expensive way after buying six different “perfect nude” polishes that all looked terrible on me.
Cool undertones (think pink or blue veins on your wrist) need nudes with pink or beige bases. My go-to is OPI’s “Put It in Neutral” – it’s this perfect greige that doesn’t clash with cool skin.
Warm undertones (yellow or green veins) look stunning in peachy or golden nudes. Essie’s “Mademoiselle” is chef’s kiss for warm-toned hands.
Neutral undertones are the lucky ones who can wear almost any nude. Try “Samoan Sand” by OPI – it’s this gorgeous mushroom-y beige that works on everyone.
Strategic Gold Placement That Actually Works
The key to minimalist gold accents is restraint. Less is definitely more here.
I’ve tried every gold accent technique in the book, and here’s what actually looks elegant instead of overdone: thin gold lines along the cuticle area or a single accent nail with gold foil.
My favorite technique? A thin gold striping tape line about 2mm from the cuticle on just the ring finger. It’s subtle but catches the light beautifully when you’re gesturing or holding a cocktail.
For gold foil application, I use tiny pieces – we’re talking smaller than your pinky nail. Place them randomly on one or two nails, not all ten. The goal is sophisticated, not disco ball.
Application Techniques for Long-Lasting Gold
Here’s where most people mess up their metallic nail art: they apply the gold details over completely dry polish. Big mistake.
The gold needs something slightly tacky to grip onto. Apply your nude base color in two coats, then wait exactly 60 seconds before adding your gold elements.
For gold striping tape, press it down firmly with a cuticle pusher, then seal immediately with topcoat. If you wait too long, the tape lifts and creates bubbles.
Gold foil is trickier. I use nail glue (just a tiny dot) or foil adhesive, wait 30 seconds until it’s tacky, then press the foil down with a silicone tool. Peel away gently – don’t rush this part.
Why Nude Nails Are Photography Gold
I never understood why nude manicures photograph so well until I started really paying attention to my vacation photos. Bright colors can clash with your outfit or distract from your jewelry, but nude nails complement everything.
Against beach backgrounds – the blue water, white sand, coral reefs – nude nails create this effortless, expensive look. They don’t compete with the scenery; they enhance it.
The gold accents add just enough sparkle to catch the sunlight without looking overdone in photos. I’ve gotten more compliments on my nails from vacation photos than any other manicure I’ve ever done.
Plus, minimalist nail designs age gracefully in photos. Those neon pink nails from 2019? They scream dated. But elegant nude with gold? Timeless.
Keeping Your Gold Accents Pristine
The biggest challenge with gold foil nails is keeping those metallic details from chipping or peeling. I learned this lesson during a week in Costa Rica when my beautiful gold accents started flaking off by day three.
Cuticle oil is your enemy here. I know, I know – we’re supposed to moisturize our cuticles. But oil breaks down the adhesive that keeps gold foil in place.
Instead, I use a non-oily cuticle cream and keep it away from the actual nail surface where the gold is applied.
For gold striping tape, the secret is sealing the edges really well. I use a small brush to apply topcoat right along the tape edges, creating a seal that prevents water and sand from getting underneath.
Reapply topcoat every 3-4 days during your vacation. The UV rays and saltwater break down the protective layer faster than you’d think.
The Maintenance Reality Check
Let’s be real about minimalist gold nail art – it’s not completely maintenance-free. But it’s way easier than complex designs.
I carry a small bottle of matching nude polish and a topcoat pen for quick touch-ups. The beauty of nude shades is that small chips blend in with your natural nail, so you don’t need perfect application for repairs.
If a piece of gold foil comes off, don’t try to replace just that piece. It never matches perfectly. Instead, remove all the gold from that nail and go with a simple nude look. It still looks intentional and elegant.
Ready to dive into the most eye-catching beach nail trend that literally mimics the ocean itself? Click “next” to discover how to create stunning ocean-inspired blue marble nails that look like tiny works of art on your fingertips!


GIPHY App Key not set. Please check settings